Firstly of all I think I better do a little pre-emptive defense here, I know fake flowers are kind of a contentious issue. And you're either a do or don't. My mum is a decided don't (I put it down to living in France, where everybody always seems to have real flowers everywhere).
I am a do. And here's why.1. Fresh cut flowers are expensive. Even grocery store bouquets. And they're dead-dead really quickly. So you'd think house plants would be the answer, But...
2. I kill plants. I don't intend to exactly. It's not like I keep them in the dark and whisper terrible things to them (ok so, yah I do, but still). But they die and then I have guilt. It's a whole big thing.
So that's my defense of fake flowers. Now on to how to make dirt cheap fake flowers look more fancified. First things first; rebranding! They're not "fake" flowers they're "imitation" or "silk"or oou! even better, they're "Faux". French = more classierer see!?
Now, the upgrade I'm doing here is on a couple of stems of Dollarstore phalaenopsis orchids. And here's the before and after:
The before looks like a stem of dollar store fake flowers, and not just because it has a taggie on it that says dollarama. The after is way more swankypants Restoration-Pottery-Hard-Barn-Ware like. (At least I think).
Want to try it?
You'll need:
A couple of stems of phalaenopsis orchids (but the fancifying techniques actually work for lots of other fake flowers too)
Some paint and a paint brush
A sharp thing and a flamey thing (scissors and a lighter are good)
Some plasticine/modelling clay
A receptacle.
Some rocks (or bark chips for authenticity)
(I happened to have everything but the flowers to hand, so my total cost was one stinkin' dolla. Which = yay!)
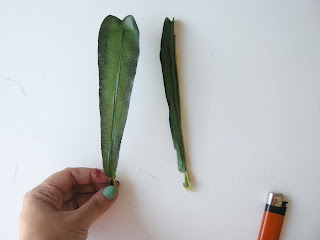
So the first step is to cut some bits off your stem. Some length from the bottom and a few of the bottom flowers too. My leaves just slid right off, but you can snip them off if you need to; save them for later.
Next step is to bend the stem into the right sort of shape, I had a look at some phalaenopsis online and bent carefully, a bit at a time, til it looked about right-ish.
Next it's time to paint, I just used dollar store acrylic, I slopped it on, then blotted it off a bit for a mottled effect. Then I used an almost-dry brush to fade the brown into the brighter green of the plastic near the flower heads.Careful not to get paint on the flowers and give them a bit of time to dry, in fact while they're drying you can do the leaves. Flatten them out, snip any loose threads away and melt up the edges some to stop fraying.
Then toss some rocks or bark chips over the plasticine and behold your unkillable, swankypants new houseplant.
Oh and if you were going for extra authenticity you could pop one of those support sticks into the Plasticine too and clip the stem to it.


Restoration-Pottery-Hard-Barn-Ware? How about: Restoration-Pottery-Crate-Hard-Barn-and-Barrel-Ware? Erin, you are *hilarious*. And you make a nice faux flower too.
ReplyDelete