OK. Hands up if you're a tiny bit uncomfortable in front of a camera? I TOTALLY am. In fact there is only one picture of me between 14 and 16 years old in EXISTENCE. I had a shaved head. And a sneer. It was not my best look ever.
I'm trying to get less crazy about pictures and doing WR has helped, because I don't have a dress form (tiny jealous sigh at the folks that do... ) I end up "modeling" my befores and afters.
Which has made me mighty familiar with the self-timer mode on my camera. I don't have a tripod and I totally can't justify one (I don't have enough camera really, and I KNOW that I wouldn't take it anywhere). So I made myself a little something to make propping my camera in weird places safer and more stable.
See?

(That's technically NOT a camera. It's a rabbit. I know this. But I don't have a spare camera.)
It's a bean bag. Only with rice and not beans. And while I feel a bit silly calling this a tutorial, here goes:
1. Grab a spot of fabric of some type. I used a bit of toddler t-shirt sleeve. Because it was RIGHT THERE. But you could use anything at all.

2. Sew around 3 (or 4) sides of your fabric leaving a hole to jam your chosen filling into. I wanted my beanbag to be fit-in-a-pocketable so I made it roughly 5" by 3".

3. Turn it right side out

4. Fill'er Up. I used an icing bag. A funnel, rolled up bit of paper or your paws would work just as well. And that's basmati going in... mmm basmati. Careful not to overfill, you want there to be some space to allow your camera to nestle in.

5. Sew Up the hole. And go crazy with the posing. Work it baby! Eyes and teeth! The camera loves ya!
Oh, and I almost forgot, 'cause the camera has someplace stable and non jiggly to rest, I turn off the flash and up the exposure time (with that little +/_ button).
x

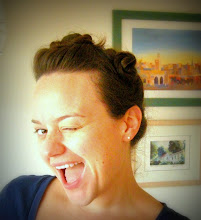


 Two shots, taken seconds apart, no meddling with exposure or colour. A reminder to keep my eyballs open.


