Showing posts with label dollar store chic. Show all posts

Thursday, August 18, 2011

Pillowcases to Women's Shortie Pajamas Tutorial - OR MC Hammer Loves My Jam(mie)s

Not Hammer Pants

So. You know how sometimes you're getting your kid ready for bed - teeth are brushed, residual funk has been hosed off, softie chums extracted from who-knows-where - and it's time to wrangle an unwilling human into footie jammies? Yes?
And sometimes you're all,
"Break it down, OH-OH OH OH OH-OH OH OH OH. PAJAMA time. Can't touch this. WOAH WOAH WOAH OH OH OH OH. Can't touch this"
Because MC Hammer is hilarious and awesome, specially when you sing the lyrics to U Can't Touch This in a Jeeves and Wooster accent?
No? Just me?
Well anyway, this has nothing to do with that. This is a half-assed sort of tutorial on how to make a pair of womens shortie jammies from a pair of pillowcases.

So. Onward!
First you need to procure a pair of pillowcases. Mine came from the Dollarama, so yay for the cheapest ever. But it seems like random, last-pair-in-this-design-no-matching-sheets pillowcases are always around and on crazy sale.
Got yer pillowcases? Here're mine:


The first step is to unpick the stitching on your piller'cases. Have at them with the seam ripper; go on, you can give it some women's-tennis-grunting if you like, I don't mind.
Now you should have EITHER two great big rectangles or 4 smaller rectangles. We're making the top first, so put that other pillowcase someplace safe. But not TOO safe.
Hokay. So the next step is to make a few snips so your big rectangles resemble a camisole shape, sort of. Like this:
I eyeballed how wide the back piece should be and was off by prolly 4 inches. Because apparently in my head I have a giant Quasimodo hump? Maybe?
The front section will be gathered so it should be about 4/5 inches bigger than you are.
And SEW! Right sides together and whip up yer side seams. You could get all fancypants and french seam them for prettiness sake. Let's pretend I did that, kay?


So now you fold over and hem the raw top bits like this see:


And here lets pretend I folded them twice instead of leaving them raw edged like this. (Man, pinking shears made me lazy. Also, laziness made me lazy).

Ok. Time to do a spot o' gathering. And I'm using the sew-along-some-dental-floss method for this. I can't for the life of me remember where I saw this; but whomever invented it might need to go and collect their Noble Prize for Awesomeness. I've heard Stockholm is lovely this time of year.
Anyway, you sew a wide-ish zigzag along a piece of dental floss then gather it up all super smoothly. Like this see.


Then sew over your gathers to hold them in place.
Should be starting to look like a cami about now.
Time to add some straps. You could use a bit of bias binding, sewn over the gathers then extended to make straps (if you see what I mean).
But I happened to have this crochet trim and a powerful yen to use it. So I made straps like this:


Then stuck some more trim over the gathers and sewed up the bottom hem. An voila. Jammie top.


Now here's where the tute gets REALLY half-assed. There are about a million tutorials on making short out there in the interwebs. my very favourite is this one here by Dana of  MADE. It makes sense and has pretty pictures and everything. My shorts look like a pair of elasticated waist short shorts. Pretty uninspiring, they just happen to be made out of a pillowcase.  And there's not a power in the 'verse could convince me to model them on the intertubes.  But lookit, this is what the jammie top looks like on your's truly


And that's it. I'm going to have Cant Touch This in my head for WEEKS. Awesome.
This is it, for a winner Dance to this and you're gonna get thinner Move, slide your rump Just for a minute let's all do the bump, bump, bump 

Oh, and I shared here:

And at the new link par-tay over at Mine For The Making - DIY Diva Thursdays. You guys! FASHUN diys! I'm all over it like a bad smell!

Thursday, December 16, 2010

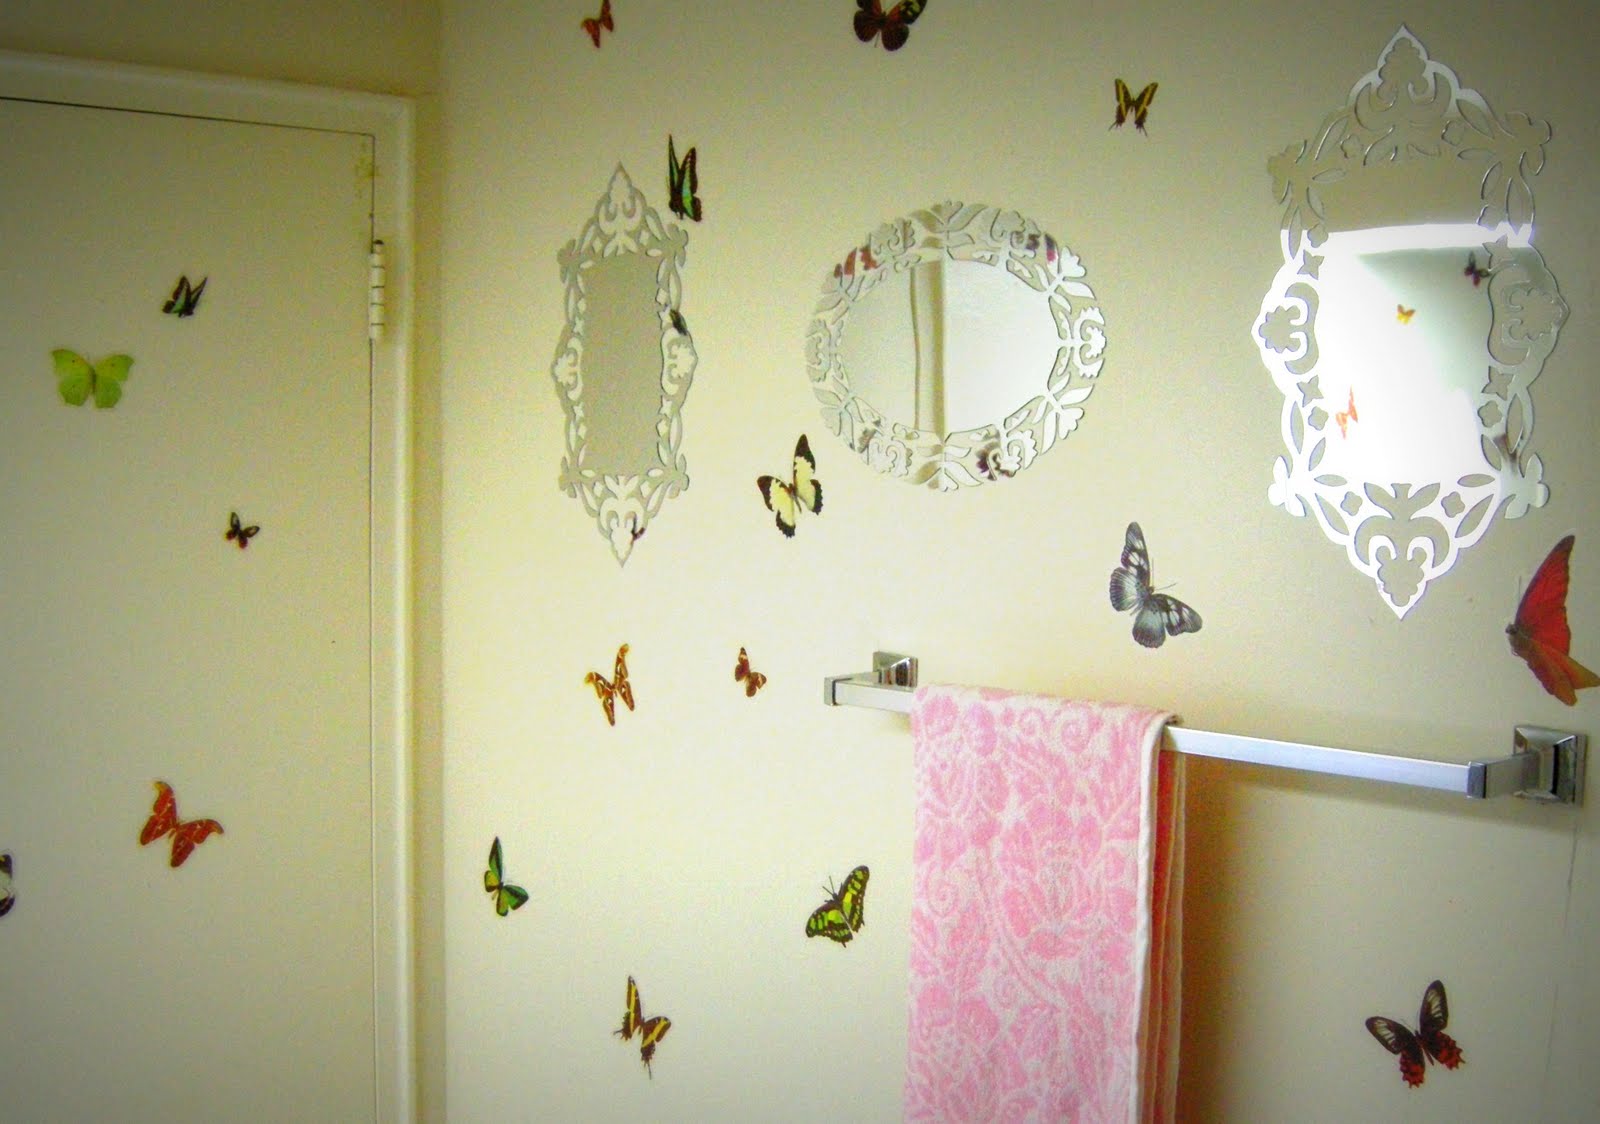
A $12 Rental Bathroom Makeover (again)

Way back when, ooou a squillion (ok like, 3) years ago, I had a rental bathroom that I hated. And while my first choice was to SACK IT LIKE CARTHAGE. I didn't. (I'm restrained, see!)
Instead I used $20 dollars worth of dollar store stuff. And I fixed it. You can read all about it right here. But here're the previous before and after shots:
We still have that same rental bathroom; but since then we've had a new bath and shower and tiles put in. But the hideous early 60's sliding door'd cabinet is a keeper apparently.
SO, that's the backstory. On Wednesday night I was whipping around the dollar store for supplies (adhesive photo-magnet backing, but that's a different post) and I spotted some sticky mirrors and had a lightbulb moment.
So, I picked up.
3 self adhesive mirrors- $2 a piece
4 plastic placemats - 2 for a dollar
3 new hand towels -$1 each
a lidded glass jar - $1
AND a big sheet of vinyl butterfly wall sickies - $2
Total = $12
The first thing I did was cut the placemats to size to use as new sliding doors, then I just stuck them over the same backing I used before (the skinny for that is here).
Big change already, and it took all of about 5 minutes.

Now, the slidey doors don't really need handles; but I happen to have some pushpins (you know, the kind for corkboard?) in the shape of teeny weeny birdies. I bought them 4 years ago from the dollar store but I've never used them for anything even though I LOVES them. Anyhow, I stuck them through the new doors and secured them with a tiny spot of Mighty Putty (like off the teeeveeeee!) Et voila. Door handles.

Then I gave the wall a quick clean and dry and stuck my new mirrors on. I was worried about how sticky they were but the answer is DUDE. PRETTY STICKY. So I lined them up careful like, and bam, another big change (If you're a renter and need to undo the stickiness, try giving stuff a blast with a hairdryer before peeling it off).

Next up I needed storage, so I dragged in some metal flowerpot buckets from the balcony(they were originally form the dollar store, anybody else sensing a theme emerging here?), and stuck stuff in them. Tubby toys? BINGO. Hairbrushes? YUP.)

I also popped stuff like Pointy Metal Objects and hair bungees in the little jar I got. Then bunged a bit o' ribbon round it.


Next really big thing was the shower curtain. I have only just recently got over the opaque shower curtain = certain death by serial killer fear that's plagued me for years. (Thanks Hitchcock you big, jowly, jerk).
Anyhow, I happened to have a piece of fabric in my stash that I love a ridiculous, paralyzing amount. My ma brought it home for me from Sardinia when she was there ( I know right!) and it's a pink and paisley patterned cotton and it feels BLOODY GLORIOUS.
But I love it so much I couldn't decide what to do with it. At all. And it's just been sitting there in the drawer. So I whipped it out, folded it over and used a handful of safety pins as curtain hooks and stuck it over top of the shower curtain we had up already. Now I get to see it everyday and I can still make something out of it next summer. And when my chums ask if I'm wearing a shower curtain I'll be all "YAH I AM!".


OK, back to the bathroom. The last thing I did was scatter butterflies all over the joint. I wanted it to look like one of those Victorian specimen boxes had come to life and gone nuts in there. And just so you know, random is HARD for me. I am a Person Who Likes Symmetry; but I like how they turned out more.

And that would be that. One bathroom. Half an hour. $12.
In case you're curious, this is what is written on the door (um, prolly best not to look too close at the pictures if you're easily offended, the girls there are Edwardian nudey shots (100 year old porn!), a gift from my sis and the start of a my collection)


And lastly, I just wanted to say something on the subject of renting; we've been in our current apartment for 4 years and a few days. Which you guys, has gone RIDICULOUSLY fast. We never really intended to be here for so long, and there are/were plans for buying a place. But you know how it is right? In addition to the Insecure Jobmarket Two-Step we've been dancing a few rounds of the Visa Application Tango. I know my sweetie is eager to get our own place but our lives here have been brilliant so I'm not in a hurry.

Saturday, November 13, 2010

Raspberry Lemonade Mittens

Hey are you guys keeping up with Grosgrain's Embellish Your Knits Month? So awesome and she makes it look super easy. You might remember how I was having a hard time with some cardi refashions (and a unicorn)? WELL, I like to think I'm an adaptable sort of girl. I figure if life gives you lemons, then you make raspberry lemonade martinis. And then whine loudly.

So in the spirit of THAT I decided to use some sweater refashion leftovers (read "collateral damage") to make me a set of THESE:

Mitties!
They were super-simple, gratifying and ridiculously quick. AND these might be the girliest things I've ever made; even though this sweater used to belong to my sweetie, (yes it's pink, but he's plenty comfortable and confident enough to wear pink. And look super hot. Really. Yum.).

Anyhow, I think they'd make pretty good gifties. For guys too, if you made them out of a not-pink, rugged, marled, lumberjack/fisherman/bear-wrestling sweater and trimmed them in something manly? Like iron fillings and shark teeth maybe?

Either way, here's how you make them:
First you'll need a felted sweater (I just hacked the arms off of this one and stuck them in the hot wash and dry with some towels. Job done.) One with ribbing at the cuffs or the bottom works best but it's not essential.
Then you'll need to turn your sweater arms inside out and figure out the shape of your mitts. Like this:

Mark the length you want and the space between your pointy finger and your thumb.
(You can totally make them a tighter fit by drawing more closely around your wrist and sewing new seams instead of using the existing seams. I wanted mine pleated so I didn't.)

Your markings should look something like this:

Next you cut along the blue line there (but not along the red one).
Then you sew along the red lines. I reinforced the join of the "v" by sewing over it a few times.
Now you should have something that looks like this:

Next you carefully snip the V shape out (as far down as you can into the valley of the V).
If you're making new side seams it might be an idea to turn them right side out then try them on before you sew up the new shape.
Here's what that might look like:

If you're making a version for guys you could stop here. Or maybe finish off the tops with some manly manly blanket stitch or um, barbed wire or something.
I hand stitched a little pleat into mine. Then popped a button on the pleat. I also added a bit of dollar store cotton crochet lace, (same stuff I used on my duvet cover rehab). And voila, warm paws and girlyness.

Monday, July 26, 2010

Lacy Linens

If I had all the money in the universe. I would buy 365 sets of 600 (million) count cotton sheets and duvet covers. And I would have a robot who would iron them and put them on for me and maybe spray them with lavender and plump up my pillows and bring me chocolates and trashy novels to read and puppies to play with and generally do my evil bidding.

What I'm saying is that I like nice new linens. But the ones I like I can't, as a general rule, afford.
I wanted to make a duvet cover and a set of pillowcases that had a Restoration Hardware/Pottery Barn, Laura-Ashley-with-a-touch-of-quirky, mismatched, stolen-from-your-grandmother's-hope-chest feel to them. And naturally it had to be on the cheap.
Here's what I came up with:


Wondering why they look that wrinkled? Yah? This is why:

And also this:

ANYWAY...
I used
A dirt cheap fitted sheet set (one flatsheet, one fitted, 2 pillow cases. In white, naturally.*)
Another flat sheet, (you could use a plain ready-made duvet cover)
About10 meters of cotton lace trim ($1/2 meters from the Dollar Store in three different designs)
Some long strips of stitch witchery (the iron-on adhesive stuff)
A handful of plastic snaps/poppers

First you take the flat sheet that will be the TOP of your duvet cover and lay it out on the floor. Then you do it again and again because your dog and baby instantly leap on it squealing and wagging. Then you decide that maybe doing this at naptime would be more sensible.

Next you mark out where you'd like your trim to go. My duvet cover has two big squares, one inside the other. You can get all math-y and work out the numbers and measure or you can eyeball it and hope for the best. (Guess which one I did.) I used a bit of white chalk to mark my lines but if you have a fancy pants disappearing pen thingy then awesome.

The next part is actually kind of optional. Depending on how brave you feel. You could simply pin your trim on along your lines and have at it with a sewing machine.
OR use your long strips of stitch witchery to stick the lace on BEFORE you have at it with a sewing machine. I did the latter.
I found it easier NOT to start at a corner, and I like the way the turned edges look (there are other ways to turn corners).

Oh, and I know you know, but don't forget to flip the stitch witchery the same way UNDERNEATH the trim.

Once you have your lace in place. Whip around it, pretty close to the edge, with a medium sized stitch on your machine. And that's the top bit done (or the whole thing done if you used a pre-made duvet cover). Stick the top good-sides-together with the other flat sheet. Whip around three sides and add a handful of poppers (or ribbons or buttons) along the bottom and voila. New duvet cover. The Pillowcases are the same thing but on a smaller scale.
Just get your robot minion to iron the lot and you're all set.

I've also been thinking that this would work really well with a heap o' cotton doilies, scattered randomly about on a crispy white cotton. Yup. I am DEFINITELY keeping my eyeballs peeled for doilies from now on.

* I am weirdly scared of dark coloured sheets. I know it's crazy. BUT, in my head dark sheets equals heavy. Therefor I could be CRUSHED LIKE A BUG under a navy duvet cover. Like a bug I tell you. Crushed.

Wednesday, April 14, 2010

Le Boutique Dollaire Couture

You know when you get struck by an idea and it pesters you until you do something about it?
Well yesterday I was doing a bit of spring cleaning. OK fine. "Cleaning" is a bit of a stretch, I was poking around in my stash and daydreaming. I noticed a package jammed down the side of Big Brown Box (the big brown box where some of my fabric lives), I fished it out and closer examination revealed a $2 Dollar Store tablecloth, bought a while ago with the intention of making it into a cape for the bear.
I opened the package and discovered that there was far more material than I had imagined. And that it didn't actually feel too horrible to the touch.
Huh. I thought.

I wonder if a person could make a passable cocktail/evening dress from a dollar store tablecloth?

It turns out that the answer is yah? kind of?


Like lot's of things this looks better on the hanger than it does on me (also, the skirt is kind of puffier than it looks here).
I'd like to think if I was ACTUALLY going somewhere that required a cocktail dress I might put a little makeup on or maybe get all crazy and run a brush through my hair... but in all honesty... who knows, it's been a while, and I don't get invited to a lot of formal dos.

Anyhoo, I drafted the pattern myself (for "drafted" read "eyeballed, cut, swore, cut then eyeballed some more") and I don't think that the straight top loves me back. The scalloped edges went all the way around the tablecloth and I though it was too cute not to include, so I did.
I was kind of (and I mean SUPER loosely here people) inspired by this Jim Hjelm bridesmaid's dress (jh5804).


And of course the devil is in the details. It would require some ridiculously high strappy shoes, a bit of costume bling and a floaty goodwill flamenco scarf.

Et, Voila. Cocktail dress.
Now. I'll have a Dirty Martini, frogs in the pond, just scare it with the vermouth.
x

Thursday, March 18, 2010

I'm going to call this one Marvin

I was mooching around the Anthro website the other day and noticed something that hadn't occurred to me before. It wasn't that their footwear this season is a little on the MEH side (though it totally is), it was that almost every item on there has a name. And often they're kind of abstract. and purty.

Hello Fragrant Valley dress and Clinging Blossoms cardi I'm talking to you... Wait, what's that? You love me too and you want to come and live at my house? SIGH.

So, I wondered if maybe I should start naming my clothes. Would I feel better if the peanut butter encrusted shirt I'm wearing right now was the "Furled Blossom Blouse"?
Well maybe. So with that in mind, let me introduce you to the April Showers cardigan.

and here's the detail shot:


And a pin. (it's not quite finished, I thought I had hooks and eyes in my stash, but nope.)
I didn't take a before picture because I actually started messing with this cardi AGES ago. It's a really soft merino cotton mix and it think I might have "liberated" it from my Ma at some point. It used to have longer sleeves. But they weren't quite long enough for my simian-style arms. So I hacked them off and hemmed them with two rows of straight stitching. Then I ignored it for 8 months or so.
Last week it finally got fished out of the basket. It was missing a few buttons, which is why it was in the basket in the first place. Instead of replacing the missing buttons I whipped all of them off. The I stuck on some costume drama (Persuasion from 2007. Dude. So awesome) and hand sewed some beads. The beads were actually leftovers from the dollar store card making kit I used for the bear's party invitations. Yay for things that justify my hoarding impulse!
My big problem was randomness, my brand of crazy likes PERFECT SYMMETRY AT ALL TIMES. So deliberate randomness is a bit twitch inducing. I also think that the cloud could be bigger (and I do have Northanger Abbey to watch).
Hooks and eyes will go on when I get them tomorrow. It's Friday so I can spend hours in the fabric shop sans baby. So. Exciting. (Wait, does this mean I need to get out more?)

Saturday, February 20, 2010

Good(will) Karma

Remember how I was worried about working up some lousy karma by altering a vintage dress? And you all were so lovely and reassuring? (Thank you SO much for that by the way, consider me pep-talked!)

My sweetie comes home early on a Friday so I had some bear-free time to go poking and rummaging and prodding at The Goodwill. I put on something easy to whip off in a tiny-space-speed-changing-challenge, sharpened my elbows to optimal defensive capability then headed off.

And I totally scored!

Recently I've been eyeballing other peoples' denim skirts covetously. Old Navy has a few styles of them at the moment but I haven't even been trying things on in there (so as to avoid the shiny, mass-produced pretty temptation).

So, I had a vague idea that I wanted a denim skirt. An A-line one. In a light-ish wash. That wasn't too short...
OK, so not so vague; and I don't know 'bout you but normally going thrifting with a set idea of what I want means that there will be NOTHING but 1980's embroidered sweatshirts on the racks.

There were 5 skirts! In my size (squee!)! I had to try them all on, and eventually came home with two. Which you guys, has never happened to me before.
Here they are:


This one is by Tommy Hilfiger and it's nice and heavy and the stitching has that slightly more expensive look (what IS that? It's subtle but it's totally there.)
I love how my sweetie is flying Teddy around, superman style in the background of this picture.
I snagged this one because I liked the 70's retroesque thing the pockets have going on.


I also found a very silly lacy scarf that my inner 6 year old demanded (Oooou! Like a flamenco dancer! clap clap stomp. WE WANTS it. we wants. PLEEase?.)


I got it, it was all of 2 bucks and my poor inner 6 year old, I won't let her eat cookies anymore so she probably deserves something.
I also scored a shirt dress that I love so much it may get it's own post (or possibly a marriage proposal).
What I'm saying is, it looks like my karma is doing OK.

Wednesday, February 3, 2010

Busted! And Another Dress...

So. I needed to used my Wardrobe Refashion get out of jail free card. But I... I was framed I tells YAH! You got the wrong guy! There were totally extenuating circumstances. AND I actually did a refashion on what I bought. and... it was super cheap? and probably a second? Which means that I was practically recycling?
NO?
OK. Fine.
Here's what I bought.


For $2, from the Dollar Store. Which from hence forth shall be know as LE BOUTIQUE DOLLAIRE. They're cotton/linen mix men's summer shirts. As it's still -5 here I am assuming that Le Boutique Dollaire has a cruise collection. Just like Chanel.

S'not so pretty huh? This is only one of them. I bought three. Now I don't happen to have a bowling team that needs a uniform, (though how awesome would that be!?) but I did happen to have an IDEA.

An idea prompted once again by Anthro and by something that I used to do ages ago.
The anthro inspiration was this: The Reed Dress, $129 CAD

Which was also available in navy until yesterday.
When I was a teen, (a young, crazy teen! Sigh) I used to make a summer dress at about this time of year. Like a pep talk for myself and my wardrobe that no, it wasn't always going to be winter and YES there would be flip flops again at some point.
I haven't done it for years for various reasons and now seemed like a good time to resurrect the tradition.
Then when I spotted the shirts I had a lightbulb moment.

So that's the back story here's what I made:

Shirt after

I'm hoping you'll be kind enough to let your eyes slide over the unfinished sleeves and lack of ironing and the pale bare legs. I wanted to get a shot of it before the light disappeared. Also the last night's gym hair, that's just cause I'm kinda gross.

I'm also not completely sold on the accessories but it's one of those dresses that needs something. Here's what it looks like without.

Shirt no ax

I actually made it a bit too big and I'll have to take it in a bit more. And finish the sleeves. I don't think I'll do the rolled sleeve thing like on the Anthro dress, but I might put a little cuff on them.
Now I'd like to order up some weather please. 25 C. The slightest warm breeze. The smell of the sea. Anytime soon would be good.
x

Friday, January 22, 2010

The World's Worst Lumberjack!

That would be me.
I'm afraid of heights. and chainsaws and bugs, and sometimes trees. But those Lumberjack fellows have it made when it comes to the brushed cotton flannel. It's all warm and softie and nice.
And cheap. Well the shirt that I picked up from the dollar store way back in December was.
It might be a bit cheaty but I bought it specifically because I knew I was taking The Wardrobe Refashion Pledge and figured it could be the not-a-tragedy-if-I-pooch-it-up prototype for future shirty refashioning.
Anyway here it is in all it's unaltered glory...


I p'ticly like the inadvertent froggy fashion commentary. Apparently he writes for Women's Wear Daily.


And here' it is refashioned.
(This picture was the best of about a bazillion, so imagine if you will, how THOSE ones must have looked. And yah. little bit awkward and NO. I haven't so much as brushed my hair.)


Ok. and here it is without the distracting forehead shine.


What I did was,
1. Unpick the collar and remove the top part. Then sewed it up again.
2. I cut out the arms and then made the armholes smaller. Not terribly sucessfully actually, but now I know what to do next time.
3. I reattached the sleeves giving them a bit of puff. Next time I would totally have them puffier. I like this sleeve length though andI added these little pleats at the cuff (I need a better picture of them).
4. I added darts front and back. Unpicking them a squillion times each, just for fun.
5. I made 2 box pleated ruffles with the spare bits of sleeve. (I think I got the idea from a tute on Burda style. Maybe the one with all the ruffle techniques that I am now completely unable to find? is right here. Thanks Wendy!)
Do hit me up in the comments if you've a wish for a tutorial. I'll be making at least one more of these fellas (with thrift store shirts naturally!)
Crumbs. I forgot to say that I was HUGELY inspired by clevergirl's First Men's Shirt Refashion and that her tutorial is super clear and easy to figure out.
Related Posts with Thumbnails